This is an Independent Consultant Website. To access Shelf Reliance directly, visit www.shelfreliance.com.

Thursday, June 23, 2011

What is TVP?


Many people are curious about what TVP is. TVP stands for texturized vegetable protein. It is an alternative to meat that provides excellent protein, is economical, and is easy to store and use. TVP provides the protein of meat without the fat or the mess that cooking and browning can create. The most popular TVP product is TVP Tacos. In fact many popular fast food chains use this in their recipes as a meat extender. You can make a quick meal, such as tacos, using TVP in 15 minutes for much less than the cost of ground beef and with more nutrition. In our family we also love to use TVP Ham or TVP Bacon on salads and baked potatoes to add flavor and crunch without adding calories. TVP does not last as long as freeze dried meat, but I like to have it in my home store because it costs less and if the needs arises for me to live off of my food storage I will be able to extend the freeze dried meat I do have or use it on it's own and feel confident that my family is getting good nutrition. TVP is also very convenient for camping as it weighs very little and can be quickly rehydrated or added to dishes.

TVP is made from soy flour where the soy oil has been extracted. It is cooked under pressure and then extruded and dried. Not only is TVP high in protein, but its also high in fiber and low in fat. This makes TVP ideal for food storage and also for every day use. Because TVP is not made from meat, it does not have the contamination risk that many meats have with bacteria such as E. Coli and Salmonella. Because it is soy based, it is perfect for those on a vegetarian diet.

To reconstitute TVP, pour ¾ cup boiling water over 1 cup TVP and let stand for 5-10 minutes. It can also be added dry to dishes with adequate liquid such as soups or spaghetti sauce. The texture of TVP can be adjusted by the amount of liquid added, so you can experiment to find out just how you like it. 1 oz of TVP is equivalent to approximately 3 oz of meat. After rehydration, TVP should be treated like meat and must be refrigerated and eaten within a few days.

(TVP facts taken from shelfreliance.com)


Here is a great TVP Taco recipe from Tawny:

5 Minute Taco Night

You Will Need:

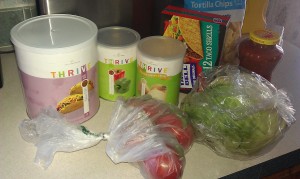
*Thrive Taco TVP *Lettuce *Salsa

*Thrive onions *Tomatoes *Corn chips

*Thrive Peppers *Cheese *Tortillas


Directions:

1.Reconstitute enough TVP for your family’s needs. Remember the TVP almost doubles when reconstituted. For example, if you need 1 cup of TVP, reconstitute half a cup. I reconstitute my TVP by covering it in HOT water and letting it sit. I drain off any excess water. 2. Reconstitute onions and peppers to meet you family’s needs. Again, cover with water, let sit, and drain excess water.

3. While your other ingredients are reconstituting, warm your tortillas in the over. I warm mine at 300F for 5 min.

4. Again while other ingredients are reconstituting, chop lettuce and tomatoes.

5. I keep grated cheese in my fridge, but if you don’t, now is a great time to grate that cheese. You could also reconstitute some yummy Thrive freeze dried cheese.

6. Open your chips and salsa.

7. Serve

I serve this ‘buffet style’ and let everyone make his or her own plate. Some make Taco Salad with a salsa dressing, some have tacos, some have nachos, and some have a combination of them all! It is a real crowd pleaser!

This is also GREAT served with Beans! Yummy!!

Who doesn’t love a crowd pleaser that is healthy and can be prepared in less time than it takes to order at a fast food restaurant?


Wednesday, June 22, 2011

Pizza Dough

by Jamie
My family has become spoiled! I make home made pizza once a week. I know your probably thinking pizza isn't very healthy. I have made a healthier pizza that my fam LOVES! I make a whole wheat crust and add veggies for the toppings. I got this recipe from my fave blog www.everydayfoodstorage.net. Here is a video showing how to make the dough. Krystal is making bread sticks but also talks about how to make the dough into pizza. One thing I do different from Krystal is I don't put butter on my cookie sheet (cut calories) I spray mine with pam instead. I also don`t let my dough rise. I just put it in the oven right away.

2 in 1 Pizza Dough & Bread Sticks

2 1/2 C. Medium Hot Water
5 tsp. SAF Instant Yeast*
2 Tbsp. THRIVE Sugar
Let the yeast rise.


Add

3 Tbsp. Oil
1 tsp. THRIVE Salt
6 C. THRIVE Flour (I do 100% whole wheat but you can use any variation of white or wheat flour)

Note: This recipe will make 2 cookie sheets of pizza or 1 pizza and 1 bread stick. Or you can 1/2 the recipe and just have 1 bread stick or pizza. Any of the THRIVE ingredients can be exchanged for other brands.

Toppings:

Cheese, olives, THRIVE mushrooms, THRIVE mixed peppers, THRIVE sausage (FD or TVP), THRIVE ground beef, THRIVE ham & FD pineapple (Hawaiian pizza). The sky is the limit as far as toppings go. Several THRIVE ingredients will go perfect for toppings.

Put dough directly onto a pam sprayed cookie sheet or pizza pan. Spread with your fingers. No need to flour your counter or dirty your rolling pin!


Before I start making my dough I take a SMALL bowl and add a few Tbs of oil and several crushed/minced garlic cloves and mix it together. When I take my pizza dough out of the oven to top it I brush on the oil mixture. Bake 400 deg for about 7-10 minutes (for pizza) 10-12 minutes for bread sticks or until desired browning is accomplished for bread sticks. Baking the dough prior to topping it for the pizza keeps the dough from being soggy.

For pizza take out of oven and top with your fave toppings. I top ours with cheese, mushrooms, olives, chopped peppers and sometimes broccoli. Then put it back in the oven just to melt the cheese.

For bread sticks top them how ever you like. We brush some butter or oil and garlic (like for the pizza) then add some cheese. Cut into strips and enjoy!

Tuesday, June 21, 2011

by ShelfReliance Mom

This baby is the Kitchen Mill Wheat Grinder. I LOVE, LOVE, LOVE it! I use it once a month and grind up a bunch of wheat at once, then freeze the wheat in freezer bags to keep those healthy oils fresh. For anyone who loves fresh, healthy, straight from the source food, this is a dream. You simply pour wheat in at the top, flip the switch to how fine you want the flour and let it work its magic. There are a lot of grinders out there that you have to clean a certain way because of the natural oils in wheat corrode the parts, but not so with this one. If you are new to the idea of wheat flour, you might be surprised to know that white flour comes from the same grain, it is just wheat flour stripped of all of the healthy nutrients so it is a cheaper alternative for companies for use in their products. To learn more about the differences between white and wheat flour you can visit this site.


I will be doing some video clips for YouTube over the next few days for recipes that I use because I have this awesome tool. I love that I was able to earn it for half price, and you can too-just ask how! If you are someone who has tons of wheat for food storage without a clue of how to use them, stay tuned and I will help you learn how. We'll start with this recipe for today!

Below is my favorite 100% Whole Wheat Bread recipe that I make in my bread machine a couple times each week. This is perfect for all of you out there who feel like you don't know how to make bread or don't think you have the time, but would love bread with out all of the yucky preservatives. This came from my Breadman Recipe Manual.

100% Whole Wheat Bread 1 Lb Loaf
1 Egg, room temperature plus enough water to equal 3/4 c
2 T Oil
2 TSugar
1 t Salt
2 1/4 c Whole Wheat Flour
1 T Vital Wheat Gluten
1 1/2 t Active Dry Yeast
or 1 t Bread Machine/Quick Rise Yeast

100% Whole Wheat Bread 1.5 Lb Loaf
1 Egg, room temperature plus enough water to equal 1 c
3 T Oil
3 T Sugar
1 1/2 t Salt
3 Whole Wheat Flour
1 1/2 T Vital Wheat Gluten
2 t Active Dry Yeast
or 1 1/4 Bread Machine/Quick Rise Yeast

100% Whole Wheat Bread 2 Lb Loaf
1 Egg, room temperature plus enough water to equal 1 1/3 c
1/4 c Oil
1/4 c Sugar
2 t Salt
4 c Whole Wheat Flour
2 T Vital Wheat Gluten
1 1/2 t Active Dry Yeast
or Bread Machine/Quick Rise Yeast


Note: I do the 2 lb loaf and I also add 1 t of dough enhancer. Many people say that wheat bread turns out dense for them. Gluten and dough enhancer are the magic that make your bread fluffy and moist. To learn more about why these are important you can go to this independent site.


Not ready to make the plunge for an electric wheat grinder or are you looking for one that you can use in case there was an emergency and you had 0 electricity....here's an alternative, the Grain Mill Wheat Grinder. Please note that anyone who has used a manual wheat grinder can attest to the fact that they are a lot more work.

Monday, June 20, 2011

No More Starving College Kids!

The Freshman 15! My theory is it comes from all the junk food poor college kids are living on: Ramen noodles, Mac & Cheese, Frozen Pizza! Yuck!!

Eating healthy can seem expensive. Fresh Produce goes bad very quickly. processed food is cheap because its full of ‘junk’.

Do you know a college student you care about? Would you like an easy, affordable way to provide this ‘starving’ college student real, healthy, easy to use, convenient, shelf stable food?

The perfect gift: The Q!

You choose the amount. Each month Real healthy food is sent to your ‘starving’ college student! You can even choose what foods to send! Does you student love milk but is short on space? Send him a #10 can of instant milk each month! Is she a cheese lover? Send her yummy real freeze dried cheeses each month? You can choose entrees, desserts, fruits, veggies, dairy, basics, meats & beans, anything you would like!

What college student wouldn’t love a monthly gift of food! How comforting would milk & brownies be each month? You will feel great knowing you are providing real food free of preservatives, with no added sugars or salts! What a great way to ensure he gets his fruits and veggies even when away from home!

College kids are short on space! Pantry cans are perfect! They can be stored just about anywhere! You can also provide your student with cansolidator or FRS shelving to help store his monthly gifts of goodies! Thrive foods require no refrigeration and have a long shelf life!

Many college kids don’t have access to a full kitchen, many shelf reliance foods can be eaten right out of the can, reconstituted, or warmed in the microwave!

When you give the Q as a gift, you get the satisfaction of providing a great gift, earn Q club reward points, and are always guaranteed the lowest price on Shelf Reliance Products!

The Q really is the gift that keeps on giving!

The Q makes the perfect gift for graduates, college students, newly weds, or anyone who eats!

Contact me today to set up a gift Q for your loved one!

What Is The Q? Learn More here.

Thursday, June 16, 2011

Chicken Salad

I serve this Chicken Salad recipe at parties and everyone loves it! I am frequently asked for a recipe, so here it is.


Fill your 2 qt. saucepan about 2/3 full with water and bring to a boil.

Add:
1 and 2/3 cups freeze dried chicken.
1 heaping cup freeze dried pineapple.

Boil together for 5 minutes then drain.
Cut pineapple into halves (at least) with kitchen shears.
Sprinkle with salt and pepper to taste ( I like Nature's Seasonings).
Chill all the way through.
Stir in about 1 cup of Best Foods Mayo to taste.

Add:
1/2 cup of slivered almonds.
1 cup of grapes. (green or red, whichever is sweeter and cheaper. I chop mine in halves first.)
Serve with Ritz crackers if you're stressed, rolls if your amazing. :)

Enjoy!!

Monday, June 13, 2011

I Can't Believe It's Food Storage and Magic Mix/THRIVE Chicken Enchiladas

By Rena


I love this book!  This was my first book I ever purchased about food storage, about a year before I became a Shelf Reliance consultant.   She breaks down how to use food storage items that you may be new to you, such as whole wheat, powdered eggs and powdered milk.  She also has conversion charts that I copied and keep in my kitchen for quick reference.

One of the wonderful things I learned from her book was how to make Magic Mix.  It was developed by the Utah State Extension Service as part of their Don't Waste Your Milk Campaign.  For some great recipes and ideas visit this link and download the top 5 files.
I found lots of new uses for Magic Mix and can't wait to print these out and try them!

Magic Mix
1 c (2 sticks) Butter at room temperature.  (I have usedTHRIVE Butter Powder before!)

I use my Kitchen Aid Mixer with the wisk attachment.  To the flour and milk, simply add the butter a slice at a time.

Every now and then you may need to stop your mixer and strap the wisk.
When it has a cornmeal like texture you are done.  Don't over mix, because you don't want to warm up the butter and cause it to melt down...don't ask how I know that!   Store in an empty Thrive or coffee can in the fridge.
Chicken Enchiladas
2/3 cup Magic Mix
1 cup boiling water
1 can Enchilada Sauce
warm flour tortillas

Reconstitute the chicken, onions and mixed peppers in the same bowl by covering with water for about 15 minutes then drain.  Reconstitute the cheese by placing in a plastic bowl with lid and adding 1T of water.  Put lid on bowl and shake up!  Every few minutes give it another shake.
Place about 2 T chicken mixture on a flour tortilla, sprinkle with a little cheese and roll up.  Place in glass casserole dish that has been sprayed with nonstick spray.  How many it makes will depend on how much chicken you like in them.

To make sauce wisk in 2/3 cup Magic Mix into boiling water. 
Stir as it thickens!  Add salt, pepper and garlic to taste.   Stir in enchilada sauce.
Wisk in THRIVE Sour Cream Powder.  Pour over enchiladas and top with any remaining cheese.  Bake in 350 degree oven until sauce is nice and bubbling hot. 
YUMMY!!!  Give it a try and let me know how it turns out.
More great recipes with Magic Mix are coming soon!  I LOVE this stuff!!


It's easy to keep up with the great sales and recipes! Just subscribe or follow to stay up to date!

Saturday, June 11, 2011

And the winner is.....

Megan!!!

Congratulations Megan.  Please email me to let me know what prize you would like.  Thank you to all those who entered.  I will have more giveaways in the future, so keep reading!

FYI, to choose the winner, I assigned everyone a number for each entry method in the order that you entered.  I then went to Random.org and generated a random number to find my winner.

Friday, June 10, 2011

Last Day!

This is the last day of my Birthday Giveaway! Let me know what you have done so I know how many entries to give you. If you haven't entered yet, check it out! There are valuable prizes to choose from!

Wednesday, June 8, 2011

Summer Refresher

Summer is here! I love summertime, but I live in AZ so in addition to fun and vacation time, summer for me brings extreme temperatures, dust storms, wildfire danger, and Monsoon Season (aka flood season). Elsewhere, it is the season for heat waves (continuous high temperatures coupled with humidity), tornadoes, and flooding. So, it's definitely time for a refresher on how to prepare for such situations. There are a few things that are universally important to do to prepare.

Ready.gov is a very useful site that can tell you what natural disasters you are at risk for where you live. It suggests three basic things we should all do to prepare for any emergency.
1. Get a kit
2. Make a plan
3. Be informed

Personally, I think it makes the most sense to go in reverse order. Inform yourself on the potential dangers you face in your area, then make a plan including a 72 hour kit appropriate for your situation and family needs.

Get informed!
Below I list a number of potential emergencies and some links to help inform you.

Heat wave: This could happen anywhere. In fact it is often the most harmful in places where you least expect it because people often aren't ready for it. If you do find yourself in this situation, make sure you dress lightly, avoiding polyester; drink lots of water; eat lightly--fruits and veggies are best; NEVER leave kids or pets in cars (temperatures can rise and cause death in just minutes), and make sure you check on your elderly or infirm friends and neighbors.

If you notice symptoms of heat illness such as clammy skin, excessive sweating, pallor, extreme fatigue, weakness, dizziness, fainting, vomiting, lightheadedness, or excessive thirst, seek medical advice and cool the person down as soon as possible. Signs of a heat emergency are red flushed skin OR paleness, body temperature of 106 F or higher, seizures, extreme headache, rapid breathing, rapid pulse, sweating ceases, confusion, or unconciousness. If you notice these symptoms seek medical attention immediately! For more on safety during a heat wave, check out http://www.wikihow.com/Survive-a-Heat-Wave

Wild Fires: Smoky the Bear always said, "Only you can prevent forest fires!" So, the most important thing here is to heed the warnings and restrictions for campfires in your area. My husband is a Boy Scout leader and they are scrambling right now because all of the mountains here are closed due to fire risk and therefore, scout camp is cancelled. As sad as this is, it would be infinitely worse if that warning wasn't heeded and they found themselves in a wild fire situation. Another big temptation is fireworks. It's disappointing when fireworks are restricted during this patriotic season (trust me, I know. It happens every year here!), but it is vital that those restrictions are heeded. Some other advice for reducing your risk of being affected by a wild fire is to clear dried weeds and brush from your property, have a working fire extinguisher, never drop a burning cigarette (not smoking them in the first place is even better!), install smoke detectors on every level of your home, and keep your vegetation watered and pruned. For more information on wild fires, see here: http://www.fema.gov/hazard/wildfire/wf_prepare.shtm

Dust/Sand Storm: "Sand Storms are among nature's most violent and unpredictable phenomena. High winds lift dirt particles or, in the case of sandstorms, sand, into the air, unleashing a turbulent, suffocating cloud of particulates and reducing visibility to almost nothing in a matter of seconds." If you are in a sandy or dry area you should be especially aware of this danger. These storms are especially dangerous for motorists. If you are driving and encounter a sandstorm you should try to outrun it if you can. Once you are in the storm, it is best to pull over, close all windows and vents, and turn off all lights to prevent a collision. This seems counter intuitive, but in storm situations people often follow the lights of the cars around them to get through, so if you are on the side of the road they may follow you and be run off the road or even collide with you. Sand storms are often accompanied by high temperatures, so make sure you keep plenty of water in your car when traveling. If you get stuck outside in a sand storm, seek higher ground. Do not lay in a ditch or gully as flash floods are common in areas of sand storms. For more information on sand storms, see: http://www.wikihow.com/Survive-a-Dust-Storm-or-Sandstorm

Floods: These are the nation's most common natural disaster and "flash floods are the #1 weather-related killer in the U.S." according to FEMA. There is flooding right now on the Mississippi that is breaking records. Flooding is also forecast for many other parts of the country and it happens here in Arizona multiple times each year. One of the best ways to be alert to flood danger is to check in with your local news daily. Be aware of where the flood plains are in your area and also in the areas that you plan to travel. If you are planning a hike in a flash flood area, stay up to date on the wather forecast and check regularly for flood warnings. If rain is expected or warnings are in effect, consider a change in plans. Flash floods can happen miles away from an actual storm as the rain waters rush over the hard dry ground, so don't think you are safe just because it isn't raining right where you are. If you know there is a danger of runoff flooding, create barriers like a sand bag wall, turn off the electricity to your home, elevate any valuables, then seek higher ground. Avoid walking and driving through flood waters, but if you must walk through them, do so with great caution and avoid moving water. This website is also a very useful tool in preparing for floods if you are at risk: http://www.fema.gov/areyouready/flood.shtm

Tornadoes: Although there are areas much more prone to tornadoes than others, they can happen anywhere at any time. We have seen evidence of this lately with the tornadoes in Alabama, Missouri, California, and even Massachusetts. Warning signs of a tornado include darkening skies, especially if it is a greenish or orange color. Also watch for rotation of the cloud base, very calm or quiet conditions during or right after a storm, a rumbling or roaring sound that sounds like continuous thunder or a train, whirling debris on the ground even in the absence of a funnel cloud, blue-green or white flashes in the distance at ground level (these could be a sign of power lines being snapped in high winds). In case of a tornado, seek safety in a shelter, basement, or inner room with no windows. Stay in the middle of the room because debris often gathers around the edges and could injure you. You should also understand that if a tornado strikes, you will not have utilities for about a week, so stock up on non-perishable food as well as water to get you through. See Lessons from Alabama for a first hand look at what you should have from a survivor of the recent Alabama tornado outbreak. Look at these links to see what to watch for, how to prepare for, and what to do in a tornado. http://www.wikihow.com/Prepare-for-a-Tornado http://answers.usa.gov/system/selfservice.controller?

Earthquakes: There isn't an earthquake season as far as I know, but we'll include this just to round out the list. To safegaurd yourself in case of earthquakes, make sure all heavy furniture that may tip is secured to the wall. Do not place heavy objects on high shelves and make sure mirrors, heavy pictures, and shelves with heavy objects are not placed over beds and couches to prevent injury. You and your family should have earthquake drills and have a plan so you know where everyone will meet and communicate after an earthquake occurs. If you are in a car during an earthquake, stop and stay seated, and wait until it's over. However, if you are in a parking garage, get out and crouch next to a car. If you are in a building during an earthquake, you should drop, take cover (protecting your head and neck), and hold on. If you get trapped in a building, slowly make your way out, pushing on objects in your way gently to see if they will move. If it doesn't budge, it is load bearing and should be left alone. Once you are outside, get away from tall buildings if possible in case of an aftershock. If you are outside during an earthquake, stay there. Move away from buildings, trees, street lights, etc that could fall on you. Do not seek shelter under a bridge. No bridge is earthquake proof. For more information about earthquakes check out these links: http://www.wikihow.com/Prepare-for-an-Earthquake http://www.wikihow.com/Survive-an-Earthquake

Drowning: This is not a natural disaster, but it is a danger during summertime. Drownings are extra heart breaking because in most cases they could have been prevented. In order to do so you should make sure all pools are fenced in. If you have a small kiddie pool, only have it filled if you are there supervising. When you are done, dump it out. Do your best to block access to pools and hot tubs. Teach your children to swim. Learn CPR and keep emergency equipment handy. Keep your eyes peeled--there should always be an adult swimmer outside the pool keeping an eye on those in the water. Make sure drain covers are up to date and don't allow children to play near drains. Here are a couple of links with more info about how to prevent and spot drowning this summer: http://www.mayoclinic.com/health/child-safety/CC00045 http://mariovittone.com/2010/05/154/

Make a Plan!
Everyone's plan will be different depending on location, number of family members, ages of family members, etc. My blogging partner, Tawny, has an excellent post on what to consider when making an emergency plan. Check it out here. Shelf Reliance also has a great checklist here.


Get a Kit!
If you are not familiar with an emergency kit, they are basically backpacks or other containers that you can easily grab and go with in case an emergency requires immediate evacuation. They contain items that you will need to make it through the first few days of an emergency while you wait for help or safe return home. It is a good idea to keep an emergency kit in your vehicles, in school lockers/backpacks, and at the office. Shelf Reliance has a number of emergency kits available. These kits are a wise investment for your family, make a great birthday/holiday gift, and are a fabulous and unique wedding gift too. Right now the 2 Person Survival Pack is on sale for only $79.10 (plus taxes and S&H) when you order through a consultant. Email me at mythrivehive@gmail.com if you are interested in that deal. Shelf Reliance also provides a free emergency kit planner to help you customize a kit based around your personal needs. If you are feeling ambitious, you can always make your own kit too. I will post soon with more details on 72 hour kits and what my family's kits contain. If you want to get started now, here are two great resources to guide you: http://www.nationalterroralert.com/72hourkit/ http://lds.about.com/od/preparednessfoodstorage/a/72hour_kit.htm

I hope this information is helpful to you this summer, so that this year you will not only survive, you'll also thrive no matter what life throws at you!

Fruit Granola


To Check out my Birthday Giveaway and Party click HERE


Tiffany's Fruit Granola Recipe


Shelf Reliance has an awesome granola recipe that we can serve at parties. Although it is good as is, I made a few alterations to it myself which people keep asking for! I will just share it on here so everyone will have it available to them.

Tiffany’s Coconut Almond Fruit Granola

Yield 7 Cups

2 ½ c Oats                   ¼ t nutmeg            1/3 c THRIVE Pears
½ c almonds, sliced    ¼ t cloves             1/3 c THRIVE Blueberries
½ c coconut 1              ¾ t cinnamon        1/3 c THRIVE Raspberries
½ c walnuts                  2 T honey
½ c brown sugar          ¼ c butter, unsalted (½ stick)

Preheat oven to 300°F. Mix first 8 ingredients in a large bowl. Melt butter and honey in a small saucepan over low heat. Pour butter mixture over oat mixture and toss well. Line cookie sheet with foil and spread out mixture on lined sheet. Bake 20-25 minutes stirring occasionally. Cool on the baking sheet. Toss with Freeze Dried fruit mixture (or one of your choice). Store airtight at room temperature for 1-2 weeks. Can be served as topping for yogurt, eaten as a cereal with milk or as a snack on its own.


I just have to give a shout out for our brown sugar which is good sealed in a can for 10 years! Have you ever opened up a bag of hardened brown sugar when you were wanting to bake some cookies... never again!


To order any of these DELICIOUS ingredients for the cheapest price available, just go to hilarylarson.shelfreliance.com or email me at mythrivehive.blogspot.com.

Monday, June 6, 2011

Food Waste

To Check out my Birthday Giveaway and Party click HERE


Today I had planned a post on snacking with Thrive foods, but as I opened up WordPress, I was greeted by a post on food waste.

“One category stood out as being accurate and useful—the dead waste. These are not spending decisions, but rather mistakes. The parking ticket, the bank fee, and yes-the food we let rot. Almost everyone in the United States does this to one extent or another. Nobody likes it, and everyone finds themselves annoyed and a little guilty and embarrassed when it happens. So why do we do it?”
The author goes on to give reasons for food waste. You can read the rest of the article here.
This really got me to thinking.
One of the major reasons I started using Thrive foods is to save money and stop food waste.
When it comes to food waste, many of us have the best of intentions. We buy fresh fruits and veggies, hoping to use them. We buy in bulk to save a bit of cash. We save all those left-overs hoping to eat them and save a bit of cash. No one WANTS to waste food. We all feel a bit of guilt about it. After all, many people are in fact starving. And all that food is wasted money!
Here is an embarrassing bit. A sneak Peek at my fridge before Shelf Reliance and Thrive.

My fridge was full of good intentions, crammed full left overs. Everything had its own Tupperware dish.
We have extended family living with us. It seems there is always either too much food or not enough. So with each meal, a little dish of leftovers is added to the over crowded fridge. We forget about the left overs and before you know it, we have mold soup adding to the problem of food waste.
We like to buy in bulk, and make as few trips to the grocery store as possible, so we use to buy a great deal of produce with the intention of eating healthier. With out fail, when I would reach into the fridge to get that “fresh” produce for a delicious recipe, it had spoiled. And we were adding to more food waste.
We all do it. We are all guilty. We all want to change it.
  • Americans toss $75 Billion in food annually.
  •  The average American family throws away 14%  of their food, that’s almost $600 every year in meats, fruit, vegetables and grain products.
  • Americas throw away 96 billion pounds of food annually. That’s 263 million pounds a day. Eleven million pounds an hour. Three thousand pounds a second.
Food Waste is a serious problem!!
But *HOW* do we reduce food waste. Obviously ‘eat your left overs’ and ‘plan your shopping trips’ just isn’t enough!

The How is Shelf Stable foods that can be measured out in usable portions.
For example, With Thrive, you only use what you need. And the rest is stored in the cupboard for up to a year until you are ready to use it again. No more throwing out freezer burned fruits and meats. No more left over veggies from dinner growing mold in the fridge. Use only what you need.
Taco TVP is a BIG hit in my house. Because of the dynamic of our house hold, sometimes its hard to know just how many will be eating dinner at home on any given night. With Thrive, I can easily reconstitute just enough Taco TVP for those I know will be eating at home. If more come in, I easily reconstitute a few more serving without any food waste. (And it only takes about 5 min! I really love that!!)

Because Thrive foods are designed to be shelf stable, you can open a can of corn today, use what you need, and go back to that can a year later and use only what you need once again!
Thrive foods are convenient, easy, fresh, shelf stable, and are truly an easy way to cut back on food waste.

What could your family do with an extra $600 a year saved just by limiting food waste?

By:  Tawny

Sunday, June 5, 2011


To Check out my Birthday Giveaway and Party click HERE


Now, here is a post from my new blogging partner Jamie!


Home Made Bread

I have been asked by several people lately for my bread recipe so I thought I would take the time and just post it here so every one can enjoy it.  It truly is the easiest and most delicious bread ever!  I got this recipe from one fave blogs every day food storage.

I use this recipe for bread, rolls and cinnamon rolls!  For the cinnamon rolls I use 1/2 wheat flour and 1/2 white flour.  I also add a Tbs of cinnamon to the dough.

EZ Bread

4 Tbs sugar
3 tsp yeast
2 1/4 c. warm water
Let sit until yeast "grows"

Add
4 Tbs powdered milk (NOT instant)
2 tsp salt
3/4 c. potato flakes (NOT beads)
6 c. flour (1 c. wheat flour, 5 c. white flour)


Mix that together.  Then kneed for a few minutes.  Let rise until doubled.  Punch down and form into a big ball.  Cut the ball into 2 smaller balls.  Form into 2 loaves and put in a pam sprayed bread pan.  Cover and let rise.  Bake 350 deg for 18 minutes.  To watch a video on how to make this click here.  You can add whatever mixture of flour that you like.  I add 1 c. of wheat to help the bread not be so light and fluffy.  My kids wont eat wheat bread yet so this is our happy medium right now.  With out the wheat the bread is almost too light and fluffy. 

For rolls spray pam into a casserole dish.  Form rolls to desired size.  Cover and let rise.  Bake 350 deg for 20-22 minutes.  For the rolls you can use any mixture of four you like, we prefer it with 100% white flour.

For cinnamon rolls roll out dough to about 1/4" thick.  Spread butter over the dough and sprinkle with cinnamon and sugar.  I like to add raisins or cinnamon chips.  Roll up and cut into the sizes you want.  Put on to a pam sprayed cookie sheet and let rise.  Bake 350 deg for about 18 minutes.  I do not add icing to ours to cut out calories.  To watch a video showing how to make these by every day food storage clickhere.  She will give you the recipe for the icing.  

So there you have it.  My super easy, super delicious bread, rolls and cimmanon rolls recipe.  Hopefully your family will like them as much as my family